31 Day Nail Challenge – Day 19 + tutorial (galaxy nails)

I love the stars. I love the awe inspiring beauty of the vastness of space and the unfathomable expanse of it. Space speaks to me of the unknown, possibilities and my own childhood conclusion that the universe we live in did not happen by chance.

I’ve wanted to do this design for a long time. I tried it once before I started blogging, but I hated the way it turned out. Today I’m still not entirely happy, but how can you truly capture such breathtaking beauty on such a small canvas?

image

image

image

There are a lot of tutorials out there for how to achieve this look, but I wanted to add mine to the collection.

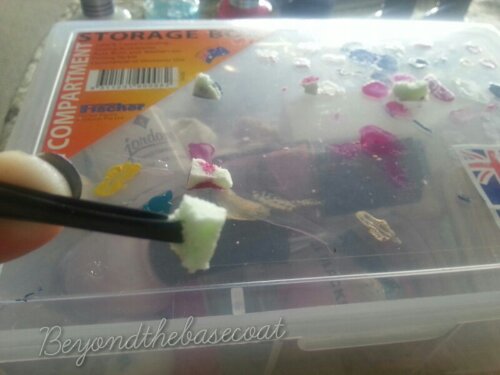
You’ll need teeny bits of sponge and tweezers – I found this much easier to use than a whole sponge between my fingers.

image

And some polishes that reflect the type of nebula/galaxy you want to create. I used Kleancolor Black and Black Out (I genuinely adore this black glitter polish!), Sally Hansen Thinking of Blue, Jordana Raspberry & White, and a sticky as QY glitter polish.

image

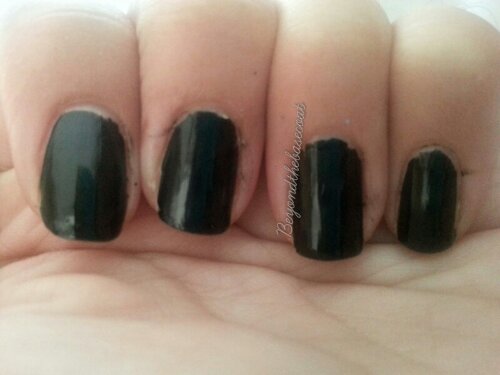
I started off with just one coat of black, then did a slick of Black Out.

image

image

I could have quite happily ended here, but I didn’t. Taking my blue polish, I sponged on random spaces. You might need to go over a few times to show up.

image

Then my pink/purple over top, but not right out to the edges.

image

Finally I added in the white and went over with the glitter finish.

image

I’m definitely going to try this one again sometime.

Peacock Feathers – tutorial

Hello again. Today I have a tutorial for you on how to achieve a look like this:

565295_10151388411971181_1551548860_n

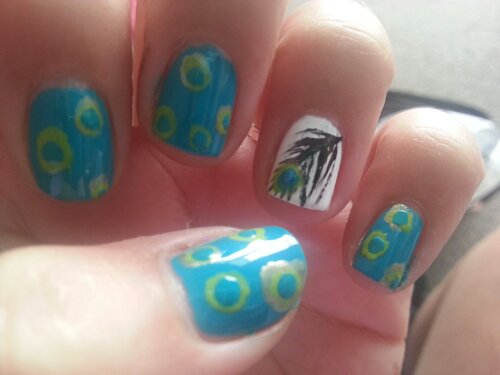
These are my peacock feather nails, inspired by a picture from Pintrest (peacock feathers). The peacock design reminded me of summer days at a local regional park where my family used to spend a lot of time when I was a teenager. There were these two peacocks who had free range if the park, and it was always a great delight to catch sight of one of them fanning out his tail. It was a fairly simple design, but it took me about 45minutes to complete. Starting off with a basecoat, paint your ring fingers white ( I’ve used Jordana White).

image

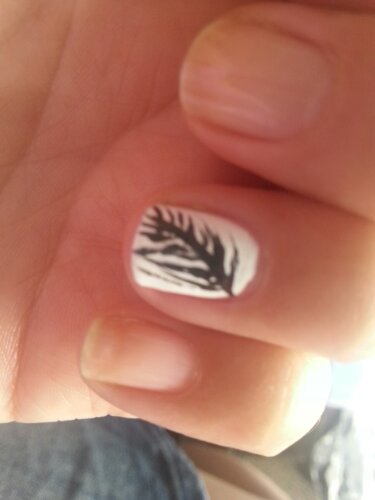
I left all the other nails bare until after I’d finished this finger, because I wasn’t entirely sure what I wanted to do on the others! With a black striper polish (mine is Kleancolor nail to toe in Black) make a slightly curved line across the nail. Wherever the thinnest part of the stripe is is where you’ll make the peacock dots. Then from either side of the big line draw in some smaller lines.

image

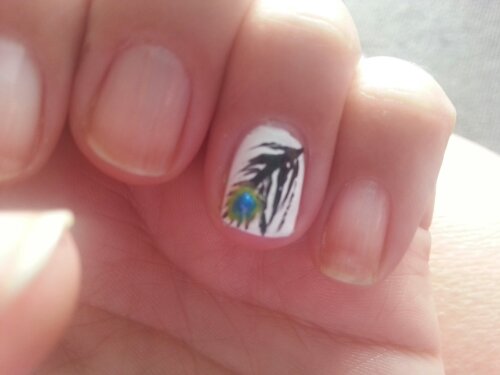
The next step you can choose to do with a dotting tool or cotton bud, but I did mine just with the very tip of my polish brushes. The colours I used are in brackets. Taking a gold polish (Jordana Super Star) make a dot near the tip of the feather, then do the same with a green ( L.A. Colors Lime) a turquoise (Jordana Boy oh Boy) and a dark blue (Kleancolor Shining Sea).

image

image

image

image

Once this was done I decided more spots were needed, so I painters the rest of my nails in two coats of Boy oh Boy.

image

Then repeating the steps I used for the peacock feather, I made dots on my other nails.

image

image

image

The last thing I did was get out my black striper again and make slightly curvy, interconnecting lines around the peacock spots, and finished off with a coat or two of Quick Dry to smooth out the bumps. I would love to see if you try this out!

Little Loves – Tutorial.

True to form, 2 days later, and the polish is off – just in time for a request from one of the students at the school I’m working at, and my first tutorial! This design is super, SUPER easy, and the technique I use is one of the first I learnt. For this tutorial, I used four colours, and my base/topcoat. This time round, they were all from Jordana. I used Tough Stuff Base & Topcoat, White, Lemon Tropic (which I have a curious feeling may be the wrong name for this colour), Lavender Fields and Purple Glam. You certainly don’t need to use these colours – any will do, so long as your accent colours really pop off the base colour!

This post is about to get picture-heavy … just sayin’!

I started with a coat of white polish (after my base coat) simply because the next colour I planned to use is really sheer – you don’t have to do this! This was Lemon Tropic, which is actually a really light blue with a pearlescent effect. I used two coats of this over the white. 

Once that base colour is dry, you’re ready to add in the details. You’ll need a toothpick or dotting tool for this (I’ve lost my dotting tool, so tooth pick it was!) What you do here, is create hearts of different sizes. The way I do this, is by drawing ‘v’ shapes with the toothpick dipped in polish, and then the bigger I want it, the longer the lines, or the more I fill it in. I generally use one toothpick per colour per hand, as the nail polish dries and goes thick and makes a little head on the tip if the toothpick that stops me from getting the really clean lines.

For my hearts, I used two purples – Lavender Fields, which is this lovely, soft lilac colour, that I could wear all day, everyday, and Purple Glam, a deep, dark purple filled with little glitters and bars. This nail polish I’m not a particular fan of – the colour I adore… the staining not so much. It is one of the few polishes that stain my nails, so I’m hoping it’ll behave on top of three other coats of polish!

Finally, using a new toothpick, dip it into white polish, and gently pop in a few polka dots around the hearts. Finish it all up with a happy, shiny top coat, and voila!

I love this cute, girly style – and I hope you do to! It’s super easy to recreate … so long as you understood my instructions!